Mission 8 - Print and Export
Estimated time for completing this mission: 20 mins
Learning Objective
Learn to use the Print template to customize the visual layout of printed content and export data for further usage.
Background Information
It's important to print formatted content or export data for further usage. The Print template allows you to customize the visual layout of printing by connecting it to the panel you want to print, and it will print everything as you designed in that panel.
Part 1: Print
BLOX used in this mission:
App Templates
- Panel
- Container
- Label (multiple)
- Any other elements you'd like to print
Data
We will use MyProjects from the previous missions. If you would like to download the dataset, click here: MyProjects.xlsx
Steps
Please refer to the Navigation Guide to perform the steps below
App Designer:
Print Customized Layout
- Create a new app named Print Projects in Module5
- Drag the Panel template onto the page canvas and make it larger
- Drag the Container template into the Panel
- Drag multiple Label templates into the Container to display project information
- Arrange the labels as you like to present the project information
-
Optionally, style the panel, container and labels with borders, backgrounds, and other visual elements

Layout composition -
Double-click on the Container. In the configuration sidebar, under "Data Source", select the MyProjects data table
- Go through each label by double-clicking it and bind it to the MyProjects data source, picking the correct column for each label. For detailed instructions on binding data to containers, refer to Mission 6: List Projects
- Drag the Print template onto the canvas
- Click the flask icon underneath the "pages" sign, then click the New Logic button to create a new logic flow
- Rename the logic to "Print Page"
-
In this logic flow, connect the connector of the Print template to the connector of the Panel template
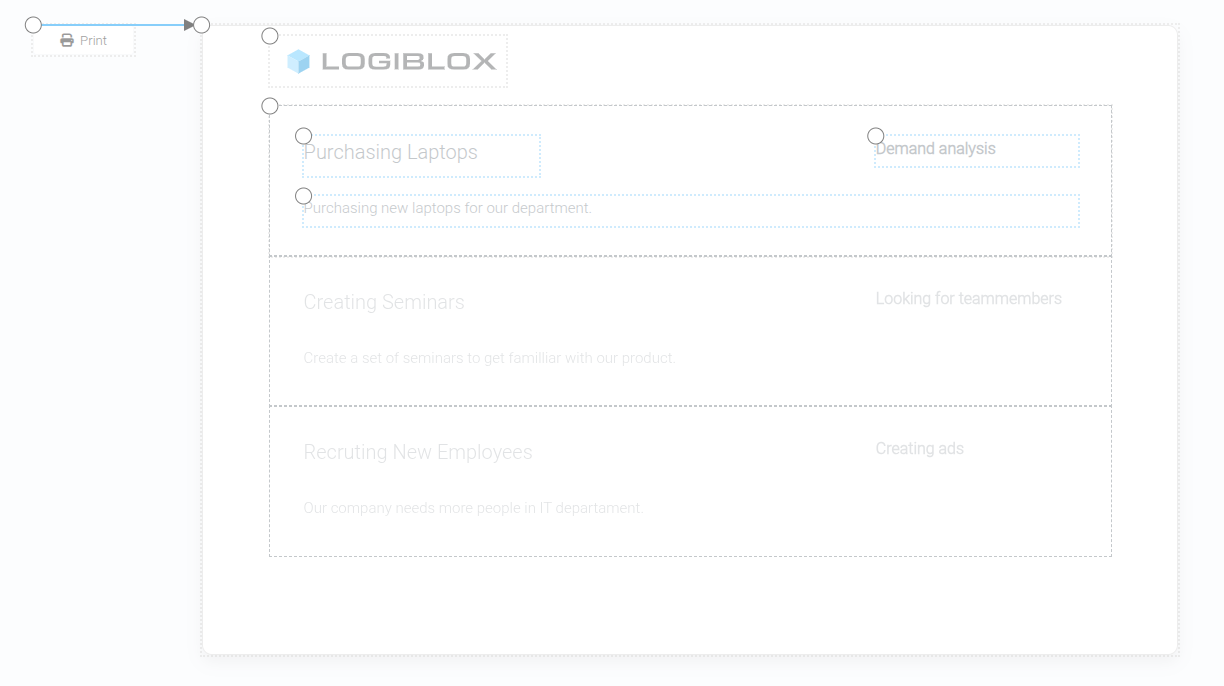
Logic composition -
Go to Run Mode and click the Print button
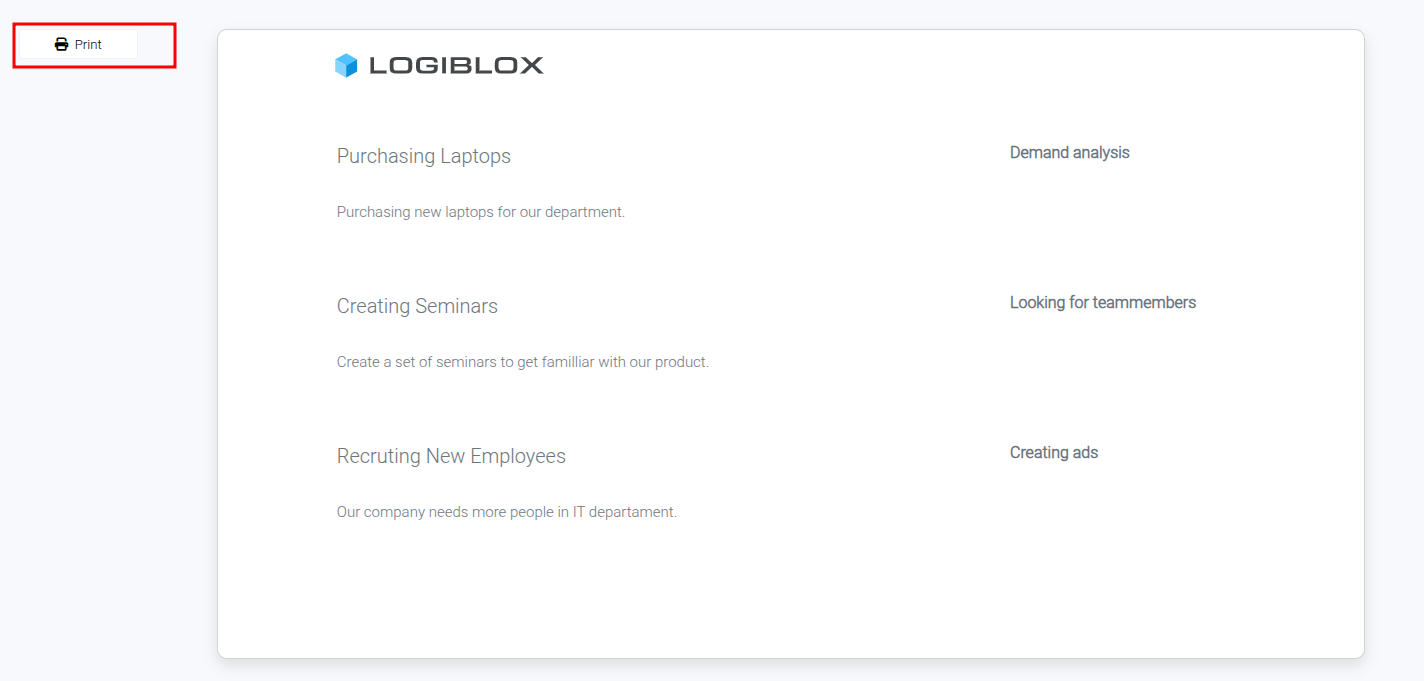
Print button in Run Mode -
The content of the panel will be printed as you designed it
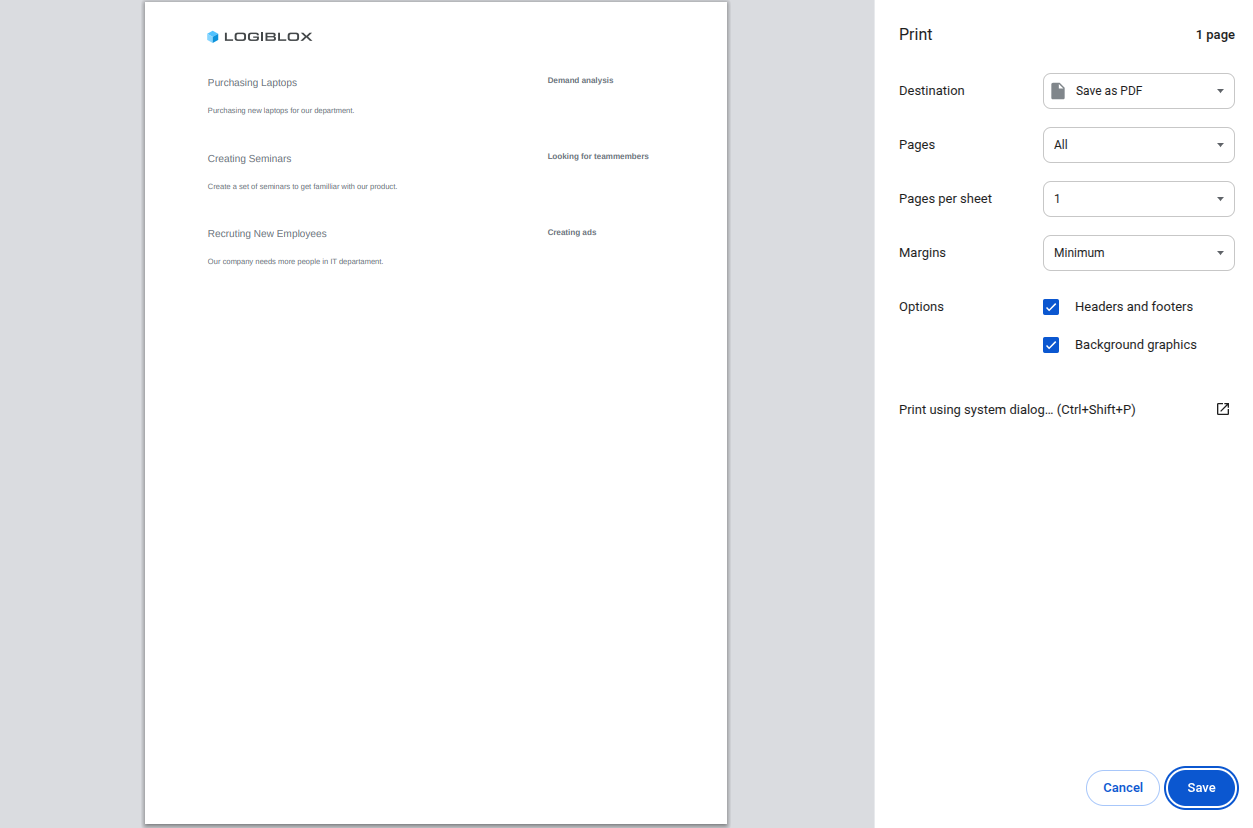
Printed result
Results and Summary
After clicking Print, a new popup will appear showing the formatted content you designed. You can then print it using your browser's print functionality.
Part 2: Export
TODO
Export functionality will be covered in a future update.